
Problem Statement
We all know that Sencha is THE Amazing framework and of course we have huge expectation as well. As part of this blog, I will be writing step-by-step process of using Yahoo weather information inside your Sencha Touch apps using Sencha Architect.
I have created following screens for the demonstration purpose

Prerequisite
- Sencha Architect
Since I have used Sencha Architect, so am hoping that you have got one as well. However, that should not prevent you from going ahead and making use of the code and concepts explained in this blog.
How do we do?
Setting up project
Launch your Sencha Architect
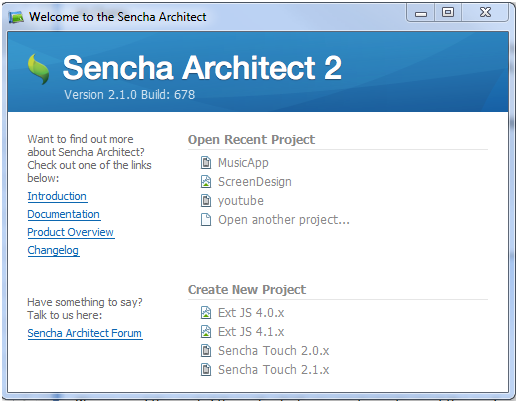 and click on Sencha Touch 2.1.x. Save the project in your desired directory by giving appropriate name to it. For example, I have saved this inside htdocs of xampp:
 Setup the preview request
and click on preview:
 So, you have your project setup in two minutes, literally!
Add a view
Let’s spend 10 more minutes and get the basic UI ready for our purpose.
I have added one navigation view, called WeatherView and added a toolbar and docked it into the bottom. The toolbar has only one button called Refresh and the icon has been aligned to its left. Finally, a panel with the only thing in it being an html node, consisting of text ” <br/><br/>Welcome to our weather app. Click on refresh to get the latest weather information.”
 At this moment your app.js has following code
Ext.Loader.setConfig({
	enabled: true
});

Ext.application({
	views: [
		'WeatherView'
	],
	name: 'MyApp',
	launch: function() {
		Ext.create('MyApp.view.WeatherView', {fullscreen: true});
	}
});
And, WeatherView.js has following generated code:
Ext.define('MyApp.view.WeatherView', {
	extend: 'Ext.navigation.View',

	config: {
		useTitleForBackButtonText: true,
		items: [
			{
				xtype: 'toolbar',
				docked: 'bottom',
				items: [
					{
						xtype: 'button',
						iconCls: 'refresh',
						iconMask: true,
						text: 'Refresh'
					}
				]
			},
			{
				xtype: 'panel',
				html: 'Welcome to our weather app. Click on refresh to get the latest weather information',
				padding: 10,
				ui: 'dark'
			}
		]
	}

});
Let the button say something
Write following code in the handler
var weatherUtil = Ext.create('Wtc.utils.WeatherUtils');
weatherUtil.refreshGeoLocation(true);
At this moment, I intend to create a custom class, which will have weather specific methods for me.
Ext.Loader.setPath({
    'Ext': '../../src'
});

Ext.define('Wtc.utils.WeatherUtils', {
    refreshGeoLocation : function( refresh ) {
        Ext.Msg.alert('Refresh Geolocation', 'Refresh geolocation logic Needs to be written!', Ext.emptyFn);
    }
});
When you click on Refresh, you get this alert message.

Using Geolocation API of Sencha touch
Before we talk about Yahoo’s weather API, let’s first give it some local feeling. First get the latitude and longitude of the user:
Change refreshGeoLocation method to have following code and add geoLocationObj config object in this util class:
refreshGeoLocation : function( refresh ) {
	if ( !this.geoLocationObj || ( true == refresh ) ) {
		this.geoLocationObj =  Ext.create('Ext.util.Geolocation', {
			autoUpdate : false,
			listeners: {
				locationupdate: function(geo) {
					Ext.Msg.alert('Refresh Geolocation','New latitude = ' + geo.getLatitude() + ' , Longitude = ' + geo.getLongitude(), Ext.emptyFn );
				},
				locationerror: function(geo, bTimeout, bPermissionDenied, bLocationUnavailable, message) {
					if(bTimeout){
						alert('Timeout occurred.');
					} else {
						alert('Error occurred.');
					}
				}
			}
		} );

		this.geoLocationObj.updateLocation();
	}
}
After clicking on Refresh, this is what you see:

Time for yahoo!
Now that you have got correct position of the user, it is time to do something from that information. However, for that we need to do some official work. You need to sign up with Yahoo and Obtaining an Application Key. Visit following page for getting the application key:
https://developer.apps.yahoo.com/dashboard/createKey.html
In case you app is not going to be web-based then you may like select Client / Desktop as “Kind of Application”

Once we have got the application key, we need to do following:
- Make a call to Yahoo’s PlaceFinder API by passing the location information and city and country, and a woeid. The woeid (Where On Earth Identifier) is a special ID (32 bit reference identifier), assigned by Yahoo! to identify any feature on Earth
- Once we have WOEID, make a call to Yahoo’s Weather API with that woeid, which will give us current weather conditions, as well as the forecast for the current and the next day.
Assuming that you have a valid Application key, now is the time for some more fun. However, before we proceed, let’s do some work.
Yahoo Weather Config
Define an object to hold the configuration values.
Ext.MyWeather = {
    APPID : 'Your APP Key',
    TEMP_UNIT : 'c',
    currentCondition : ''
}
Define Ext.YQL using which we will make further requests:
Ext.YQL = {
	useAllPublicTables: true,
	yqlUrl: 'http://query.yahooapis.com/v1/public/yql',
	request: function(config) {
		var params = config.params || {};
		params.q = config.query;
		params.format = 'json';
		if (this.useAllPublicTables) {
			params.env = 'store://datatables.org/alltableswithkeys';
		}
		Ext.data.JsonP.request({
			url: this.yqlUrl,
			callbackKey: 'callback',
			params: params,
			callback: config.callback,
			scope: config.scope || window
		});
	}
};
Get Geo Location Details Using Location Coordinates
Here I have used ‘http://where.yahooapis.com/geocode’ API to get the location detail for the given coordinates.
getLocationDetail : function(latitude, longitude) {
	var me = this;
	var params = {};
	params.q = '';
	params.format = 'json';

	var woeidURL = 'http://where.yahooapis.com/geocode?location=' + latitude + ',' + longitude + '&flags=J&gflags=R&appid=' + Ext.MyWeather.APPID;

	Ext.data.JsonP.request({
		url: woeidURL,
		callbackKey: 'callback',
		params: params,
		callback: function( success, response ) {
			if (success == true) {
			Ext.Msg.alert('Location Details','City = ' + response.ResultSet.Results[0].city + ' , Country = ' + response.ResultSet.Results[0].country + ' and WOEID = ' + response.ResultSet.Results[0].woeid , Ext.emptyFn );
			var requestConfig = {
				woeid : response.ResultSet.Results[0].woeid,
				city : response.ResultSet.Results[0].city,
				country : response.ResultSet.Results[0].country
			};

			} else {
				console.log("WOEID Calculation Failed!");
			}
		},
		scope: window
	});
}
Now, call this function from inside locationupdate listener of GeoLocation.
locationupdate: function(geo) {
    console.log('New latitude =  ' + geo.getLatitude() + ' , Longitude = ' + geo.getLongitude());
    me.getLocationDetail(geo.getLatitude(), geo.getLongitude() );
}
And, here your application tells you about your city, country an woeid:

Now that you have got WOEID or city / country name, you can invoke the weather API to get the weather details. Let’s write another method called makeYqlRequest and call this from getLocationDetail method.
makeYqlRequest : function( config ) {
	console.log( ' Weather Param = ' + config );
	var me = this;
	var cityCountry = config.city + ', ' + config.country;
	var options = {
		// query: 'select * from weather.forecast where location = ' + locationId ,
		query: 'select * from weather.forecast where location in (select id from weather.search where query= "' + cityCountry + '")'
	};

	Ext.YQL.request({
		query: options.query,
		callback: function(success, response) {
			var results = [];

			if (response.query && response.query.results) {
				results = response.query.results;
				Ext.MyWeather.currentCondition = results.channel.item.condition.text;
				Ext.Msg.alert('Current Weather', 'Weather Condition = ' + Ext.MyWeather.currentCondition, Ext.emptyFn );
			} else {
				console.log( response.error + '. For YQuery = ' + options.query );
			}
		}
	});
}
Here you go with your local weather condition being shown on your device:

Note : WOEID gives more accurate information of your location. However, yahoo weather API may not contain the details of your suburb. Hence, in such case you like to query based on city and country (as I had to do 😦 ).
Show the weather on the panel
Yahoo weather API gives weather description in an html node. However, that comes as part of CDATA. So, you can extract that and set on your panel. You can extract the html code using following piece of code.
htmlCoder = {
	encode: function(string){
		return string.replace(/./g,function(chr, index){
			return chr.match(/[\w\d]/) ? chr : "&#"+chr.charCodeAt(0)+";" ;
		});
	},
	decode: function(string){
		return string.replace(/&#[0-9]+;/g,function(text,index){
			return String.fromCharCode(text.match(/[0-9]+/)[0]);
		});
	}
};
Also, change success block of yahoo weather method to contain following code:
if (response.query && response.query.results) {
	results = response.query.results;
	Ext.MyWeather.currentCondition = results.channel.item.condition.text;
	me.weatherCondition = htmlCoder.decode( results.channel.item.description );
	var weatherPanel = Ext.getCmp('WeatherAppMainPanel');
	weatherPanel.setHtml(me.weatherCondition);
}

The final touch
Let’s add a background image into the panel. Here you go. Your app shows the yahoo weather to you.

Replacing the default weather image
While we have been able to get the weather information and forecast for today and tomorrow, one thing which you may not like is the default weather icon. For this we need to retrieve special icons from below url:
http://l.yimg.com/us.yimg.com/i/us/nws/weather/gr/
Here is what you need to do:
- Identify the url of desired image based on the condition code received from yahoo API response
- Depending on if you want icon for the day or night, append ‘d’ or ‘n’ in the condition codee
- Your URL shall look like http://l.yimg.com/us.yimg.com/i/us/nws/weather/gr/21d.png for a Haze weather during day
In order to achieve the html node with changes image, we shall do following:
Get the correct image url
results.channel.imageurl = me.getImageUrl(results);
and replace the default image src by following piece of code:
var nindex = me.weatherCondition.indexOf("img");
					var nbr = me.weatherCondition.indexOf("br");
					me.weatherCondition = me.weatherCondition.replace( me.weatherCondition.substring(nindex + 9 , nbr - 4), results.channel.imageurl);
Following is the code for getImageURL and related helper method:
	time2minutes: function(time) {
		var min = 0;

		var l = time.split(" ");
		if (l[1].toLowerCase() === "pm") {
			min = 12*60;
		}

		var t = l[0].split(":");

		min += t[0]*60 + t[1]*1;

		return min;

	},
	getImageUrl: function(data) {
		var condition = data.channel.item.condition.code;

		//check if it is day or night
		var start = this.time2minutes(data.channel.astronomy.sunrise);
		var end = this.time2minutes(data.channel.astronomy.sunset);
		var curr = this.time2minutes(Ext.Date.format(new Date(), "g:i a"));
		var dayNightInd = 'n';

		if ( curr >= start && curr <= end ) {
			dayNightInd = 'd';
		}

		return "http://l.yimg.com/us.yimg.com/i/us/nws/weather/gr/" + condition + dayNightInd + ".png";
	}
With above code changes in place, you shall be able to see the more elegant weather icons – based on whether it is day or night. Following is the weather detail with better icons:

Summary
In this article you learned about how to make use of Sencha Architect to create a project and put the basic views. Also, we talked about how we can make use of Sencha Touch APIs for getting Geo Location. Once we had the GeoLocation, making use of Yahoo APIs were relatively easy and overall app is there for us to see.
At Walking Tree we practice and recommend Sencha Products like ExtJS and Sencha Touch to build amazing web / touch apps. In case you are looking for training or professional assistance, contact us by visiting our website.


I think it is worth describing how do we get the nice weather icons from Yahoo! as the default icons that we get from the API response is, usually, not suitable for the applications.
Hello Ajit
Thanks again for your comments. I have modified the blog entry (towards end) to use better weather icon than the one we get by default.
Yahoo API used by you will give the past weather detail. If we have to know the current or future weather information then what do we need to do? Can we get it at hourly or half hourly or at any given moment of the day in future?
Excellent article.